HALLOWEEN | CREEPY CLOWN
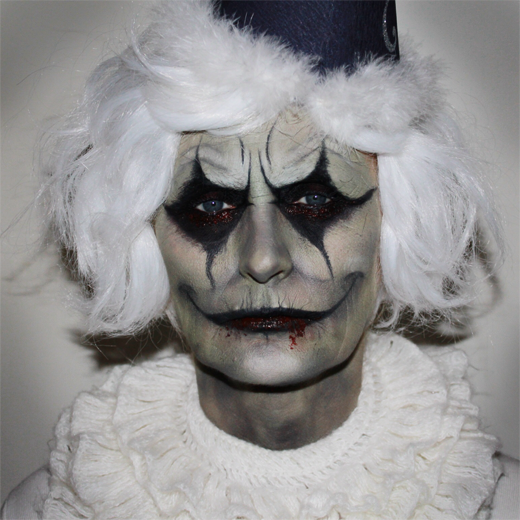

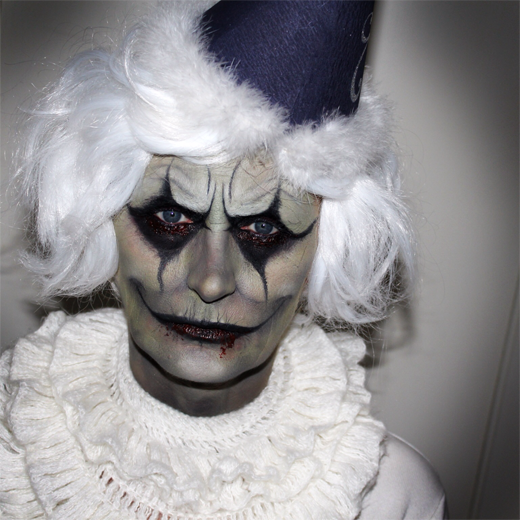
Here's one of the makeup looks I made for Halloween this year. I've been so into SFX that I wanted to go back to basics and try something with paint and makeup only. This has no SFX apart from covering her eyebrows. Playing around with colour, shading, highlighting and just a touch of pop-art painting technique gave me what I'm going to call my Creepy Clown (yes, even without the typical nose). My flash-photos always takes away a little depth but I hope you enjoy the pictures and had a wonderfully spooky Halloween.
TURNING OIL PAINTINGS INTO MAKEUP

Michael Hussar is an American painter and has, since first seeing his work about a year ago, become one of my favourite artists. His dark oil paintings both fascinates and inspires me and makes me long for halloween all year round.
One of my favourite pieces is "Hans Memling" and what you see above is my first attempt to turn it into makeup, with the intention to create a look you can actually wear for a masquerade party. I don't know about you but I most definitely will be picking up halloween inspiration from his work for years and years to come. Take a look at his Facebook page or visit his website too see more of his work.
HOW-TO | HALLOWEEN '13 | SHHH...
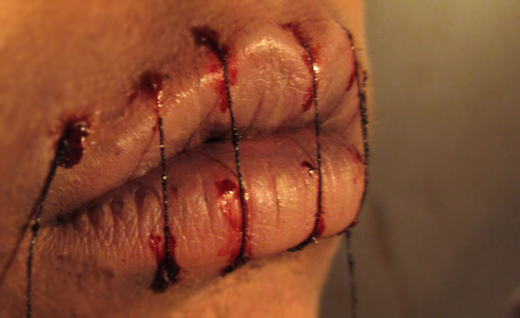
After posting this photo slash video on my Instagram I recieved questions about how I did it so I thought I'd take you through the steps even though Halloween has passed for most people now. What you'll need is sewing thread, fake blood, skin glue and cream makeup for bruising.
Before starting working on the threads I used cream makeup to make a slightly bruised look around the mouth. As you can tell I went for the look of a very mild and fresh (-as in recent) kind of bruising instead of the blue-ish, purple, red colours you would have if the bruise would be a couple of hours or a day older. Choose the look you prefer.
Cut some sewing thread into small pieces - approx. 8 cm. Apply small dots of glue along your upper lip where you want your thread to go in and out and attach the ends of the thread to the glue. Let it dry for a while, then measure how long you'll need your pieces of thread to be (depending on the size of your lips), cut them off at the lenght you need and repeat the glue step along your lower lip. Make sure you think about the direction of the thread and the natural round movements when sewing; where the thread would go in and out so that you'll know if to put the end on the upper or lower side of your mouth.
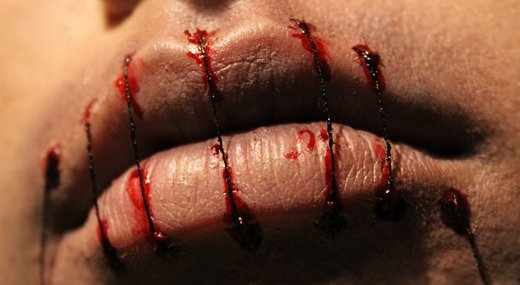
Now it's time for blood and that natural round movement of the thread that I mentioned is something you can work with here as well. Just think about where the thread is coming out and where it's going in - personally I put a bit more blood where it was going OUT so that it looks like the thread was dragging some of the blood out, which may not be needed for the spots where the needle would be going IN, in case you don't prefer to do the other way around or to add blood all over the thread which is also an alternative - it all depends on what you like and how bloody you want it. I added a small amount of a thicker kind of blood - a blood paste - to the spots where the thread was going out and a thinner, "regular", fluid blood to the other areas. And that's it, really!
POP ART - PART II
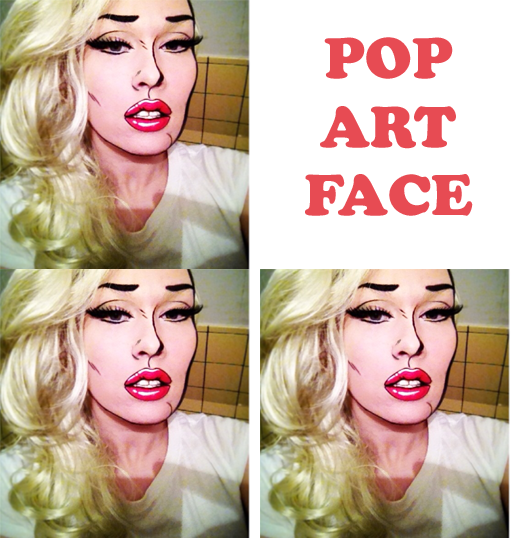
When creating your base, use a high coverage foundation to blank out the face and try to make the face as "flat" as possible. Lighten up the parts that have a bit of natural shadow and maybe flatten areas that pop out a lot if you feel the need. From there you can use an inspirational picture (maybe from a cartoon book or by just typing "pop art girl" into google) so you can get some ideas on where to place the lines on your face. Some may prefer to do this look with only a few lines here and there while others prefer to also put dots all over the face for the typical cartoon magazine paper effect if you know what I mean - it all depends on how simple you want it and basically what you prefer.
I always thought that when I finally did try this look, I would be going for the dotted version [I've been wanting to try it out for years, since I first saw it on an old MAC halloween face chart] but I finally went with just the lines - and the lips of course! This was just my first try and I wasn't meant to post it but thought "Oh what the hell" ... Sometimes it's fun to post the things you've made just so you can look back on it after some time and notice the things you would have done different today... so for me personally it's a good way of growing as an artist and that's why this will be one of the looks I'll be recreating for Halloween 2013 - and it might be a how-to video!
For lashes I would recommend big ones that looks full and thick instead of simple ones since you don't really see a lot of thin, natural lashes in pop art magazines (or at least I haven't) but more like a thick flick. And that being said - don't forget a thick eyeliner!
POP ART

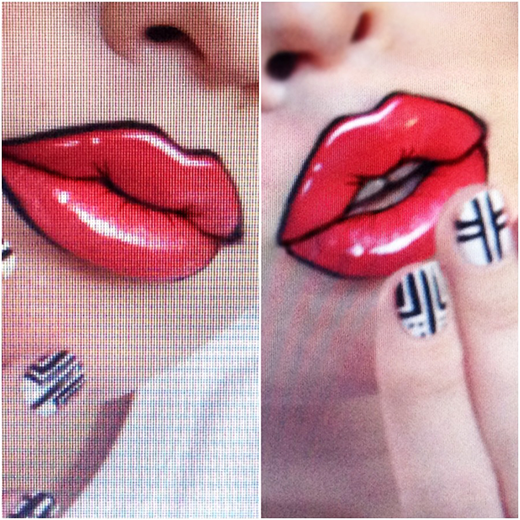
A close-up look of my Pop Art lips I made last week. Pictures from my Instagram - feel free to follow! ♥ --> iieandersson
Products used:
♦ OCC "Harlot" Lip Tar.
♦ Black liquid eyeliner applied with a small separate eyeliner brush.
♦ Lime Crime "Lunar Sea" Uniliner (although I would recommend you to find a white liner from another brand - or face paint - since this one only stays on looking good for a short, short while. It was the product I had closest to me at the moment and I was just taking a photo of the look before washing it all off anyway. If I would wear this look out to a masquerade or something similar - or you're simply just looking for a white liquid eyeliner - then I would most certainly recommend you to look elsewhere. Please do let me know if you find a good one - trying to find one myself!
